SAML with PortalGuard
This supplements the Configuring your IdP server portion of the Configuring SAML 2.0 docs using PortalGuard as your identity provider (IdP). Please ensure you've already read and understand the concepts in the Configuring SAML 2.0 documentation before continuing.
PortalGuard has support for SAML 2 integrations. Integrating PortalGuard with IE's applications requires configuration in PortalGuard and also in the specific IE application that is being used. If more than one IE application is being used, then the integration needs to be completed for each application.
Configure the SAML IdP
PortalGuard will be acting as the SAML identity provider (IdP). To configure a PortalGuard Relying Party Trust, some information from the IE application is needed.
Create the Relying Party Trust
To complete the IdP configuration in PortalGuard, we need to create a Relying Party with the following settings:
-
On the
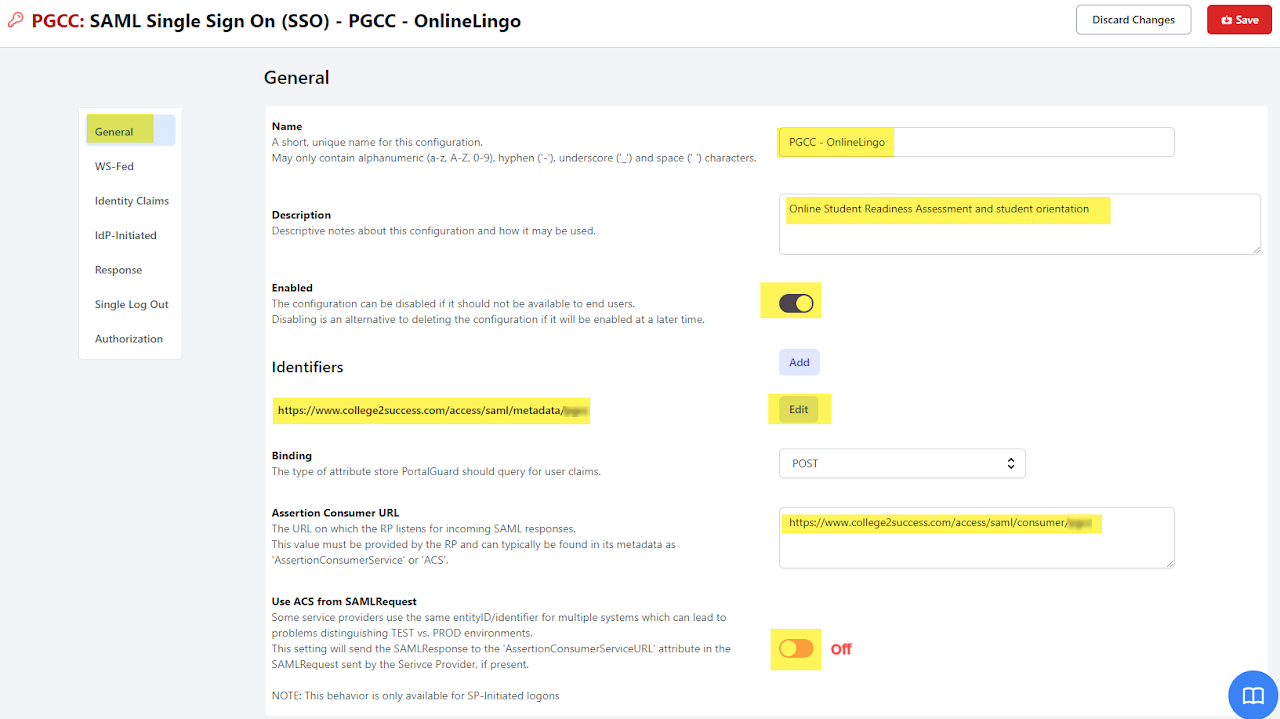
Generaltab:- Name: Enter a desired name. This is a free form field, but it is recommended to enter the Innovative Educator's application name.
- Identifiers: Copy and paste the value of the
entityIdfrom theSP metadata fileprovided by IE. - Binding: POST.
- Assertion Consumer URL: From the
SP metadata fileprovided by IE, find the element:<AssertionConsumerService binding="urn:oasis:names:tc:SAML:2.0:bindings:HTTP-POST" location="..."and copy the value of the location attribute to here. - State: checked
-
On the
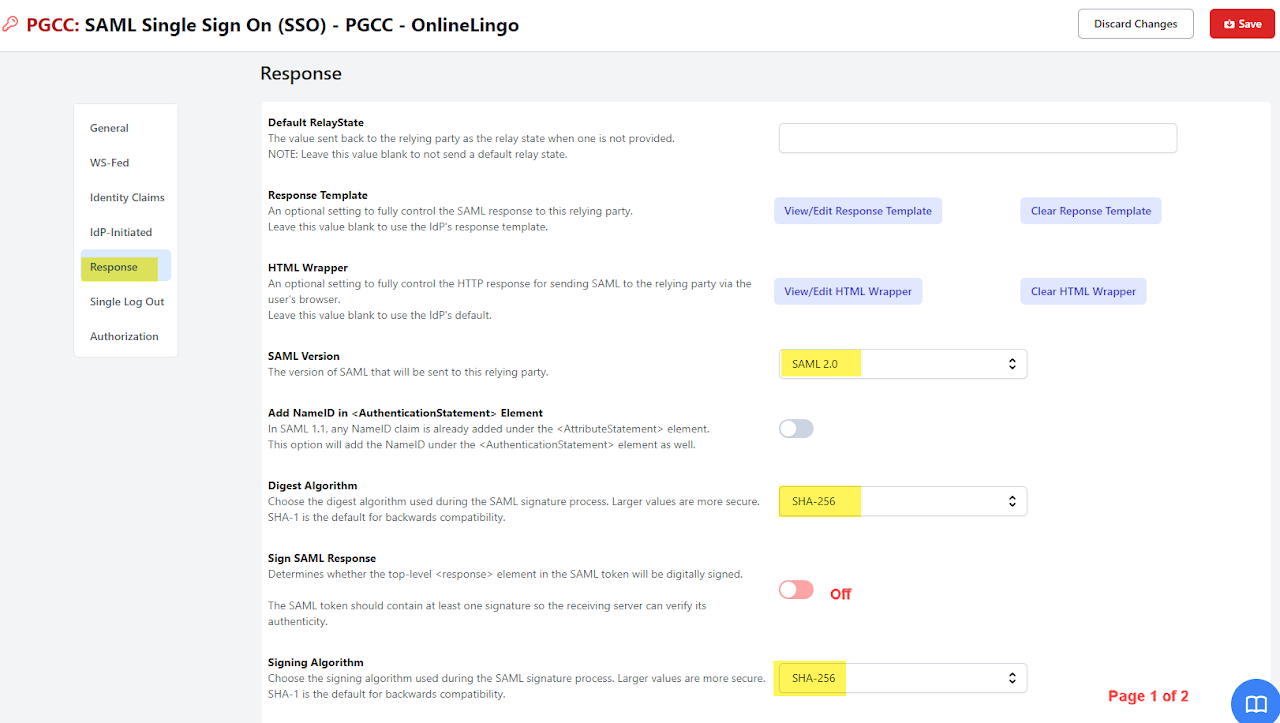
Responsetab:- Default RelayState: (blank)
- SAML Version: 2.0
- Digest Algorithm: SHA-1
- Signing Algorithm: SHA-1
- Sign SAML Response: unchecked
- Sign SAML Assertion: checked
- Override Token Timeout: unchecked
- NotBefore Clock Skew: 0
- Override IdP Issuer: (blank)
- Override Cannonicalization: (blank)
PortalGuard now knows about the Innovative Educator's application.
Releasing user attributes
We need to instruct PortalGuard to send some information about the user to the SP:
- In the Relying Party window, select the
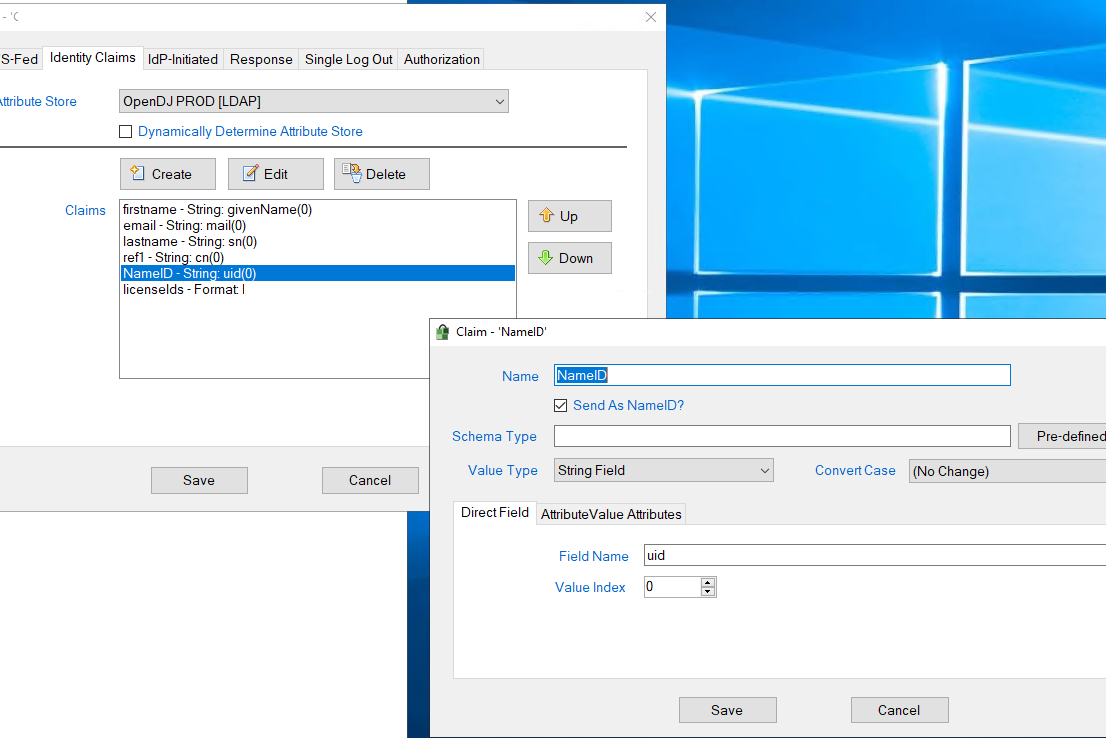
Identity Claimstab. - Select the appropriate
Attribute Store. - For each of the attributes, click
Createand then populate the settings:
Please refer to the SAML 2.0 documentation for requirements and recommendations regarding NameID and attributes and claims.
| Attribute | Send As NameID? | Schema Type | Value Type | Direct Field -> Field Name | Direct Field -> Value Index | Required |
|---|---|---|---|---|---|---|
| NameId | checked | (blank) | String Field | (uid, sAMAaccountName or other identifying attribute) | 0 | Required |
| studentLicenseIds | unchecked | studentLicenseIds | Formatted String | studentLicenseIds | 0 | Required* |
| firstname | unchecked | firstname | String Field | givenName | 0 | Recommended |
| lastname | unchecked | lastname | String Field | sn | 0 | Recommended |
| unchecked | String Field | 0 | Recommended | |||
| ref1 | unchecked | ref1 | String Field | ref1 | 0 | Optional |
| ref2 | unchecked | ref2 | String Field | ref2 | 0 | Optional |
| ref3 | unchecked | ref3 | String Field | ref3 | 0 | Optional |
- Lastly click
Save. PortalGuard is now ready to authenticate users to the IE application.
Example - One Version of PortalGuard
 The populated NameID attribute definition
 The populated studentLicenseIds attribute
 The IdP-Initiated tab
 The Response tab
Example - Another Version of PortalGuard


